Aurora Hunting 101
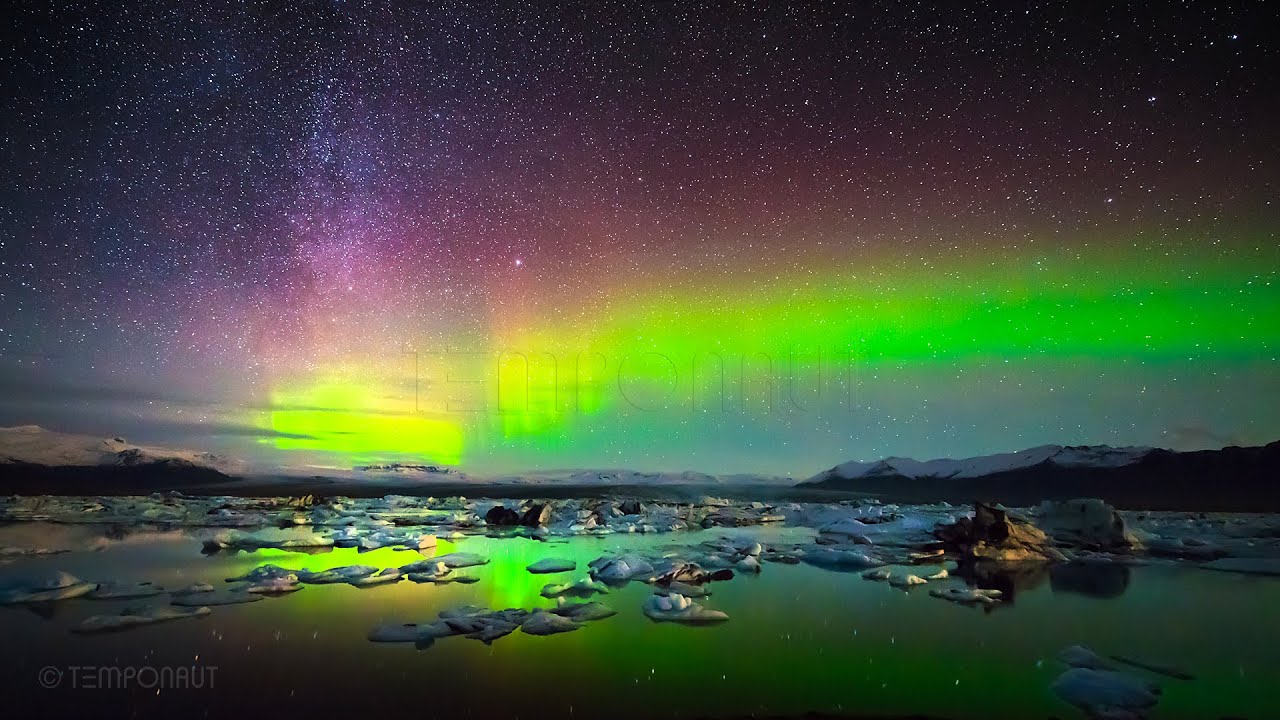
The aurora borealis (northern lights) and aurora australis (southern lights) are among nature's most spectacular displays. Capturing these dancing lights requires knowledge, preparation, and patience. This guide will help you plan your aurora hunting adventure and increase your chances of success.
Aurora Basics:
Auroras occur when charged particles from the sun collide with Earth's atmosphere, causing atoms to emit light. The colors vary based on which gases are excited—oxygen produces green and red, while nitrogen produces blue and purple.
When and Where to See Auroras
Best Locations
Northern lights are best seen in the "Auroral Oval" around the Arctic Circle, including:
- Tromsø, Norway
- Abisko, Sweden
- Reykjavik, Iceland
- Fairbanks, Alaska
- Yellowknife, Canada
Southern lights are visible from Antarctica, Tasmania, and southern New Zealand.
Best Time of Year
Auroras are visible year-round but require darkness. The best viewing seasons are:
- September-October: Mild temperatures and active solar weather
- February-March: Another peak period with longer nights
- Winter months: Long nights increase viewing opportunities, but extreme cold presents challenges
Best Time of Night
Auroras are most active around local midnight (10pm-2am), but can appear anytime it's dark. The best displays often occur between 11pm and 1am.
Essential Aurora Hunting Gear
- Camera with manual controls: DSLR or mirrorless with bulb mode capability
- Fast wide-angle lens: f/2.8 or faster (f/1.4-f/2.0 ideal)
- Sturdy tripod: Essential for long exposures
- Remote shutter release: Minimizes camera shake
- Spare batteries: Cold drains batteries quickly—keep extras warm in inner pockets
- Headlamp with red light: Preserves night vision
- Warm clothing: Thermal layers, insulated boots, hand warmers
Camera Settings for Aurora Photography
Recommended starting settings (adjust as needed):
- Mode: Manual
- ISO: 1600-6400 (higher for faint auroras)
- Aperture: Widest possible (f/1.4-f/2.8)
- Shutter speed: 5-25 seconds (shorter for active displays to avoid blur)
- Focus: Manual focus set to infinity (test during daylight)
- White balance: 3500-4500K or daylight preset
- Image format: RAW for maximum post-processing flexibility
Finding and Predicting Auroras
Solar Activity Monitoring
Several key indicators help predict auroral activity:
- KP Index: Measures geomagnetic activity (0-9 scale). KP 4+ suggests good activity, KP 6+ indicates potential for spectacular displays.
- Solar Wind Speed: Faster solar wind (400+ km/s) increases chances.
- Bz Component: Southward orientation (-Bz) allows particles to enter Earth's atmosphere.
Useful Aurora Forecast Resources
- NOAA Space Weather Prediction Center
- University of Alaska Fairbanks Aurora Forecast
- SpaceWeatherLive app
- Aurora Alerts apps
Pro Tip:
Even with low KP forecasts, always check the sky—some of the most intense displays occur unexpectedly during minor geomagnetic storms.
Composition Tips for Aurora Photography
- Include interesting foreground elements (mountains, trees, buildings)
- Use reflections in water when possible
- Position the aurora off-center using rule of thirds
- Shoot vertical compositions to emphasize the aurora's height
- Include people for scale and human interest
Post-Processing Aurora Images
RAW files allow for significant enhancement while maintaining natural appearance:
- Adjust white balance to accurately represent colors (typically 3500-4500K)
- Increase shadows carefully to reveal foreground detail
- Enhance clarity and vibrance moderately to make aurora stand out
- Reduce noise in dark areas while preserving aurora details
- Consider stacking multiple exposures for improved signal-to-noise ratio
Aurora hunting requires patience and persistence, but witnessing nature's greatest light show is an unforgettable experience. With proper preparation and these techniques, you'll be ready to capture stunning images when the lights dance overhead.